Wednesday 21 November 2012

Day out in Lucerne

Lake Lucerne

Visiting Lucerne was something I had wanted to do for a long time. Alf and I had been through Lucerne to go to the top of Pilatus last summer but we hadn't seen anything of the old town. Back at the end of October when a friend came to visit from Glasgow, I decided to brave going on the train with Baby Suisse and the pram to go and spend a day there. Baby Suisse is quite a chilled baby and usually content to be out and about so I wasn't overly anxious about the journey and being away for the day.


And what a great decision this was! It had snowed a few days before hand but we enjoyed the most magnificent blue skies. The view of the white-capped mountains from Lucerne was rather spectacular!


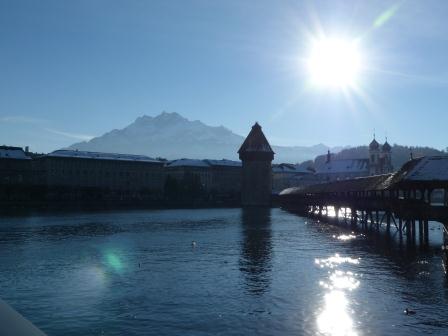
We picked up a map from the Tourism Office and decided to do the recommended walk in order to see most of the important sights in the old town in as short a time as possible (I didn't want to push my luck with Baby Suisse's patience...). As soon as we left the station, we hit the world-famous Chapel Bridge (Kapellbrücke):


Kapellbrücke is the oldest wooden covered bridge in Europe, and was originally built in 1333 as part of Lucerne's fortifications. The Kapellbrücke includes a Wasserturm  (water tower) which was used as a prison, torture chamber, and later a municipal archive.

Wasserturm
The bridge also contains a number of interior paintings dating back to the 17th century.


From the bridge, we could also spot the impressive Jesuit church:


Lucerne's old city centre makes for a very pleasant stroll and is full of nice shops (shops aren't so pram-friendly so we didn't manage to indulge in some shopping...probably best that way!). Everywhere you look, you can spot lovely painted facades, water fountains and charming old buildings:


After a spot of lunch (which included Chügelipastete, a Lucerne's speciality), we set off to gaze at the Lion Monument:

Löwendenkmal
This giant lion hewn in the rock commemorates the Swiss Guards who were massacred in 1792 during the French Revolution. 10m long and 6m high, it is a truly impressive and solemn sight.


Although we couldn't go on the walls because of the pram, we walked alongside the old city fortifications (Musegg Wall) dating from the late 14th century.


The view from the top of the hill were worth the struggle of pushing a pram up a snowy road!


On our way back to the railway station, we walked past Lucerne's second famous bridge, the Mill bridge (Spreuerbrücke). Dating from the beginning of the 15th century, it zigzags across the Reuss river.


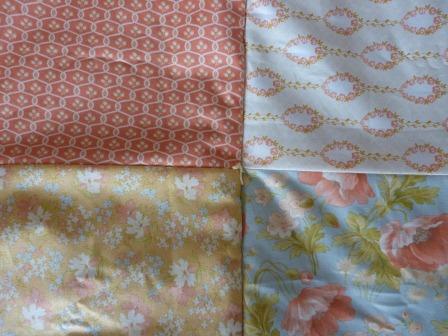
After a quick look around in a fabric shop, we decided to head back to the station to start the 90 minutes journey back home.

Wednesday 14 November 2012

The ring of fire...


And it burned, burned,burned... I have learned my lesson last week chopping and de-seeding chilies for some new recipes ;-(


Red hot "chilly" peppers

With the snow paying us a visit 10 days ago (albeit a brief one), we decided that it was time to bring some of our balcony plants in for the winter. We harvested all the chilies from our chili plants and ended up with two punnets of them!


What to do, what to do??? We don't like our food that spicy (and these little b*ggers are hot!) but it seemed a shame to not attempt to make something with them. Once again, the Tinterweb came to the rescue and I found a recipe for Chili Jam courtesy of Nigella. I can't stand the woman but her food often turns out to be good so I thought I'd make peace with her, just for this time.
 
All I did was cutting and de-seeding 150 g of chilies. It doesn't even look THAT much in the picture below but oh god, did I suffer!!


Schoolboy error, I didn't have any plastic gloves so I wore no protection on my hands. I didn't feel anything while doing it but I did not escape THE pain!! I tried rubbing olive oil on my hands to take the sting off and although it momentarily worked, it didn't make removing my contact lenses later on that day any less painful!
 
Chop chilies finely in food processor,


then do the same with 150g of peppers


In the meantime, disolve 1kg of jam sugar into 600mL of cider vinegar


before adding the chilies/peppers and bringing to the boil for 10 minutes


Leave to cool for about 40 minutes before pouring into sterilised jars


We are yet to try it so I have no idea how spicy it is or what we can have it with but I will keep you posted!

While I was in agony, I thought that I might as well cut a few more chilies and make some chili oil! Why not? This time, I found a recipe on the BBC Food website.

I chopped another 40g of chilies


and added them, along with 8 whole chilies, to 1L of olive oil that was gently being warmed up in a pan.


Pour into sterilised glass bottles using a funnel


ermmmm, I am not sure we will go through this amount of chili oil in a year (or whether putting it in my mouth is a wise idea) but at the very least, the bottles will look good in the cupboard!

Let's hope that it was all worth THE pain!!

Monday 12 November 2012

Snuggle blanket

Happy Handmade Monday!
 
Inspired by the mini-quilt I made last year and by how simple I had found the whole process, I decided to use some of my left-over Buttercup Moda Fabric to make another little blanket for one of my nieces for Christmas.
 
I simply love the fabric squares from that collection, the colours are so beautiful...


I am genuinely thinking of getting some more of these squares to make myself a double bed spread!
 
The problem with making the quilt was that I did not really have a backing fabric that matched the beautiful Moda fabric and that I could also use to make the quilt border. I wanted to use some of the fabric I already had without having to buy anything. I found an old Barbie fitted sheet from my childhood (which my Mum had kept for some unknown reason) with pink and white stripes which I thought looked nice and girly but clashed a bit with the front of the quilt.


While I was looking through online tutorials to remind myself how to make quilt borders, I came across the Red Pepper Quilts blog and a tutorial on how to make a quilt without binding. That solved my problem nicely! No need for borders and not as fiddly as I thought it could be, the front and the back of the quilt do not need to perfectly match, they can both have their own "style".


Another success I would say, using fabric I already have and learning a new technique!


I hope my niece will like it :-)

Join me on a craft tour over at Wendy's Handmade Harbour .

Wednesday 7 November 2012

Not quite like in the picture...

When a friend lent me a sewing book a few weeks ago, I had a bad case of "Why doesn't my house look like this?"


This book is very inspiring although you may just get depressed flicking through it for too long as there is no way that any normal person I know (with a day job, children, messy dogs, a budget...) can have a house that looks so effortlessly stylish.

Anyway, while I knew that the overall look couldn't be achieved, I thought that I'd give a try to these little sea creatures to cheer up my bathroom.

Picture from Sew Sunny Homestyle book

Blame it on the fabric I chose, on the fiddly shapes or the lack of detailed clear instructions for the shells (or blame it on the boogie...) but this is what I now have in my bathroom...


Not quite like in the picture as I said... but at least I got to use some of my stash of African fabric that have been lying about in my cupboard for over 2 years now!

Hip hip hurray to half-successful sewing projects :-)
Related Posts Plugin for WordPress, Blogger...